Roy Porter will be teaching five seminars at CSES2016. Click here for more information!
In the past two issues of Catersource, I have discussed the various aspects of setting a table. In the first of this series, I examined the questions to ask and have answered. Next, I talked about mise en place—that is, organizing all of the components on site and the best way to tackle setting the table. Finally, in this concluding part three, we escape flatland and build the tablescape, focusing on getting components onto the table efficiently, and with a consistent look. Let’s get started.
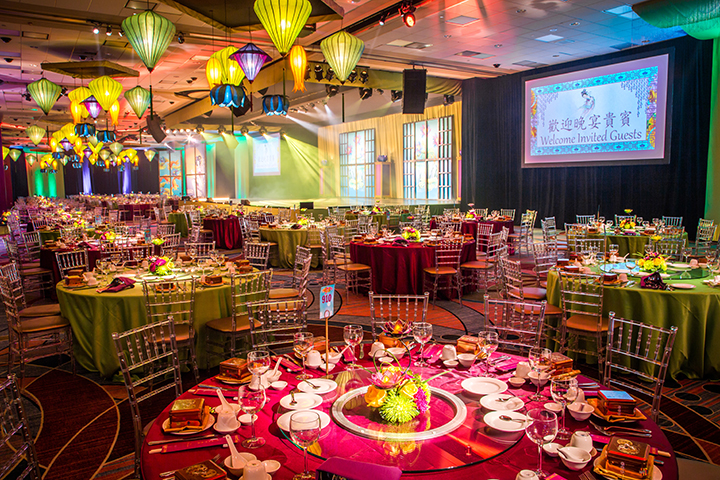
Photo courtesy of Decor and More
Nomenclature
Call things by their proper specific name, i.e., water goblets, butter spreader. The practice is professional and less likely to be confusing and cause errors. Quality assurance is an all-the-time practice and sets a tone of professionalism.
Scheduling staff
Start with five or six staff per 100 covers. As staff adapt to the production process, experience and efficiency will kick in. The result? You will need less staff. Save on the labor or double up, get it done, and move on to other tasks.
Hand washing & cotton gloves
Hand washing is first line of defense in reducing the transfer of bacteria to staff and guests.
Ensure your staff washes their hands thoroughly. Next, if a lot of silver and stemware is to be placed, issue white cotton gloves for handling components during the setting. The gloves reduce fingerprint and smudge residue.
Polishing cloths
Every setting team member also needs to be armed with a polishing cloth. Commercial flour sack towels work the best, as they are lint free and durable. I used to require staff to carry polishing cloths but grew tired of dealing with noncompliance. You need to pick your battles. Ultimately, I started supplying the cloths. I issue them at the beginning and collect them at the end.
Distribution: mise en place at the table
Based on the TSO (table service order), write on each sheet of a yellow 4 x 6 Post-It® note:
• Table # or name / How many covers (seats) for the specific table (i.e., #7/8)
• Indicate on the table clock (i.e., 2:00, for example) the position of any special seating; WC (wheel chair) access needed, or HC (high chair) if indicated on the layout drawing. A chair can be removed now and not have to be carried through the event later.
• Place the labeled note on each table, in the same spot according to the layout drawing. This sets the foundation.
Table name, number stands
The layout drawing indicates how the tables are to be labeled. Get the number stands down first because when things need to be handled, you can call out “Table 15 is missing a spoon.” Place them in same location on each table and position the stands so guests can see them easily as they enter the dining area.
Tip: When staff sees something beyond an immediate quick fix, instruct table setters to lay the stand down on the table until the problem is addressed. This draws attention and serves as a marker to fix something. Once the issue is resolved the stand is placed upright.
Centerpieces
Planning determines who is responsible for getting the centerpieces placed on the table, be it the planner, designer, florist, or the caterer. Occasionally, designs call for specific centerpieces on specific tables, so now is the time to get them positioned.
Move ’em out
Assign staff to pile the components in the center of the tables avoiding the centerpieces, so there’s less walking back to the work area for more supplies. Remove any packaging. Follow the order in which the items are to be positioned on the table (i.e., the last piece set should be on the bottom of the pile). Refer to the checklist for that specific order. Do not start setting the components!
Use a 24” wide utility cart. Load it up and move through the area, placing the components. Use trays if you have to. This distribution step is key. It eliminates time wasted walking back and forth between components source and the tables.
Placement
When distribution of flatware is nearly complete, assign specific staff to begin proper positioning on the tables.
While knives are placed, forks and spoons are placed simultaneously. A parallel process is taking place, all starting from the same table. Staff moves quickly from table to table in an orderly procession, placing flatware. The team calls items to fix and notes good work. A good team picks up speed, reaching 12 to 14 seconds per component per table as they move along.
Most items need to be placed on the tables before placing the stemware (more on stemware placement later). This is the point where you check the planning notes and layouts provided for direction on placement and style.
Follow the order
There is a specific order as to which items go onto the table in order to be most efficient. The order is detailed in the checklist (in part I of the series, online here). This order was developed over several years of setting thousands of tables and is the most efficient for getting items down and dealing with placement issues.
Placemats
Placemats are generally absent from traditional formal dining. However, placements are making a comeback as a design element in rustic or themed events, providing texture, color, contrast, or theme within a tablescape. Usually made of heavy cloth, canvas, wood, plastic, or woven palms, etc.
Tip: Recently a designer added thick woven hemp placemats as the round tables were being set. Some planning and a table setting mock up would have identified the overlapping corners problem early and perhaps a solution or alternative could have been worked out.
Charger
A charger, also known as a service or chop plate, is the very first item to position in the setting and is placed in the center of the setting, one inch from the table edge. Occasionally chargers have decorative designs. Make sure that designs are facing in the same direction for consistency.
General points for handling & placing flatware
• Review the menu to determine the order of courses and what us used with each course.
• Handle with a polishing cloth, by the waist (sides), or with white cotton gloves.
• Look for bent tines, rust, discoloration (tarnish), or food residue. Replace as needed.
• Decide at the planning phase based on the style of the meal and service, be it:
- Continental style: Tines face down
- American style: Tines face up
• Review the menu, as this also dictates specific placement of certain flatware.
One-inch rule of thumb
An inch is roughly the distance from the tip of the thumb to the first joint on 97 percent of all people. So, why place components an inch from the table edge?
The one-inch rule comes from etiquette. Ruffled sleeves and French cuffs can catch on the flatware and move it up or propel it across the table with sudden gestures. Setting flatware back an inch from the edge solves this issue.
The other problem with placing flatware at the edge is once a table is bumped, usually while people are sitting down, all the settings are messed up. The one-inch leaves a little leeway.
Some designers want the utensils staggered. It really does not make a difference, so long as standards are set and changes communicated to the staff setting the tables.
Note: On very formal meals, an etiquette-conscious staff would not stagger flatware.
Make a jig
To help new staff become familiar with the placement I made a jig with some basic indicators. No, not the lively folk dance…a jig—in this case a custom-made tool used to assist in controlling the location and positioning of flatware. Very helpful for consistency.
Knives
Knives are the first flatware positioned on a table. In place of a charger, the knife helps to frame the setting. Place knives on the right side of the charger with blade facing to the left (in).
Often with salads, two knives are placed: one for salad—which is removed after the salad service—and a second for the entrée. If that’s the case, place two knives side by side on the right.
Flatware rules of thumb
Forks are placed on the left side of the charger or setting. Review the menu for course order and what is being served.
On budget events where there is no charger, a dinner fork is placed to the left side of the setting. To get the positions down, take a dinner plate set in the center and usually the distance left from the knife is about 11”.
The dinner (entrée) or place fork is located on the left side of the setting. Depending upon the course and service, additional forks for salad and/or fish are placed to the left of the entrée fork.
If the salad is served after the entrée, the salad fork is placed to the right of the dinner fork. Check the menu for guidance. If fish is served as a first course, then the fish fork is placed on the outside, next the salad and then the entrée, from left to right.
Here are some other flatware rules of thumb:
Salad fork: In most cases to the left of the entrée fork
Salad knife: Placed to the right entrée
Fish knife: Placed to the right entrée and salad knife
Soup spoon: When soup is served as the first course, the spoon is placed to the right of the knives
Fish or oyster fork: When shellfish is on the menu, this special fork is placed on the right side of the setting
Again, the order might reverse based on the course order. Check the menu.
Bread & butter plate
Placed on the left side above the forks at the 10:00 to 11:00 position. Often you have to adjust placement at this point as the plates encroach on the next setting. Work it out placement details on the first table.
Butter spreader
Butter spreader (not a knife) is placed on the bread and butter plate with the blade facing in (to the left) in either of three positions: diagonal, horizontal, or vertical. The placement is dictated by the placement of stemware.
Diagonal: The default placement is where the spreader is placed diagonally at the 10:00 and 2:00 position, usually found when stemware forms a triangle
Horizontal: Most common in long banquet tables, the spreader is placed at the top of the plate, blade facing down, and parallel to the table edge
Vertical: Aligns the spreader with other flatware
Dessert fork
Top of the setting above the charger or space, handle to left, tines pointed to the right, so the fork can be drawn down at the guests’ left. There are times when the table setting is so crowded that the decision is made to omit the dessert fork and serve it with dessert. Avoid stabbing the dessert with the fork.
Dessert spoon
The dessert spoon is placed at the top of the setting above the charger or plate, handle to right, tines to the left. If both a fork and spoon are specified, place the spoon above the fork.
Iced tea spoon
Above the charger/plate, parallel to the table edge, meaning the scoop on the left, handle on the right.
Teaspoon
If a coffee or tea station is set up, skip placing teaspoons on the dining table. If there is coffee and or tea service at the table, then place the teaspoon to the right of the knife(s). Again the ends should be even with the knife blade.
Doilies
Sometimes doilies are placed under water goblets and or iced tea glasses to help collect the condensation forming on the glasses.
Transition to stemware
Once the above items are placed we transition to stemware, placing it on the table in the proper position and handling only once. What does this mean? It is more efficient to carry stemware around in the containers they were transported in. Work in teams of two, one carrying the container, the other pulling and placing. Other options are either to carry the rack on the your hip, or develop the strength and balance to carry like an oval tray. Or, use a utility cart.
Tip: If the stemware is provided by a rental company, place masking tape on the container and label the container as to what was in it: wine, water, etc. This step will make it easier in scullery later to know what goes where.
General points for stemware
Check for lipstick residue, fingerprints, chips, and cracks. Clean or replace as needed. For water spots, often a quick buffing with the polishing cloth will do the trick.
Sometimes when placing glass and stemware you need to negotiate for space. This needs to be worked out on the first table.
In tight quarters, move the water goblet slightly to the left.
Avoid placement under the charger or plate rims as this makes access difficult for guests and can also be noisy.
Stemware placement
Water goblet: Placed on the right side, one inch directly over the knife.
Wine glasses (universal and/or red): Placed to the right of the water goblet, at 3:00 or 4:00 from the water goblet.
White wine glass: Placed to the right of the red wine glass, or place to form a triangle—meaning the red moves up and white moves down. Water goblet stays in position.
Champagne flute: Remember during the planning stage and asking about the timing of the toast? If the toast is early, the flute is at the far right or bottom of the triangle because it is the first glass used by the guests. If the toast is following a course, set it further in, or higher up in the triangle.
Make a triangle
If the toast is right away, set the flute at a 45° angle or at 4:00 or 5:00. This makes it easier for the staff to pour and it’s the first glass most guests will reach for.
At more traditional gatherings the toast is later in the meal and it needs to be placed around the 2:00 position.
Chopsticks holder (Hashioki) & chopsticks
A chopsticks holder is placed over the charger or spaced slightly off center to the left. Place chopsticks on the holder parallel to the edge of the table, with the narrow (eating) ends resting on the holder. This is the most polite way to present and rest chopsticks.
Plates for pitchers
Plates with doilies are often placed on tables when some self-service is expected for drinking water, lemonade, or iced tea.
Coffee cup saucers
Place saucers at 1:00 or 2:00 on the right side of the setting. If space permits, place the saucers to the right of the flatware.
Coffee cups
Turn handles all the same direction at a 45° angle to the right. Often elegant glass coffee cups such as glass pedestal mugs are set out that don’t require saucers. Set handles in the same position.
Sweetener caddy
Check to see that the contents are fresh, not solid, placed in the caddy with labels facing the same direction and set in the same location on each table.
Sugar bowl
Whether filled with ground sugar or cubes, include the tongs or serving spoon.
Creamer
Same location on each table. Handle positioned for easy pick up by guests.
Salt & pepper shakers
Placed in the same location on each table, preferable between two settings with the salt on the right. One pair per four guests. Inspect to ensure it is clean and non-caked.
Lights, please
For candles: Stand the wick up so it’s easy to light. Light the wick to melt the wax so the candle lights faster later. Place candles in the same location on each table.
Battery operated: Make sure the batteries are charged.
Napkins: folding, rings
Avoid placing napkins in the water glasses or wine goblets. The practice is dated, unsanitary, and makes it difficult for staff to pour water.
Limited space dictates placing folded napkins on the charger, in the center of the setting so they are easy for guests to pick up.
Sometimes a menu card or place card is nestled into a pocket fold. Thus, napkins need to be folded to accommodate the menu card.
When presetting salads, napkins are to be placed to the left of the charger, or placed under the salad plate so they are easy for the guests to remove.
On another note, napkin rings are showing up more often as of late. Decide their placement in advance.
Placeholder
If specified, the card (place) holder is positioned on the table above the dessert flatware.
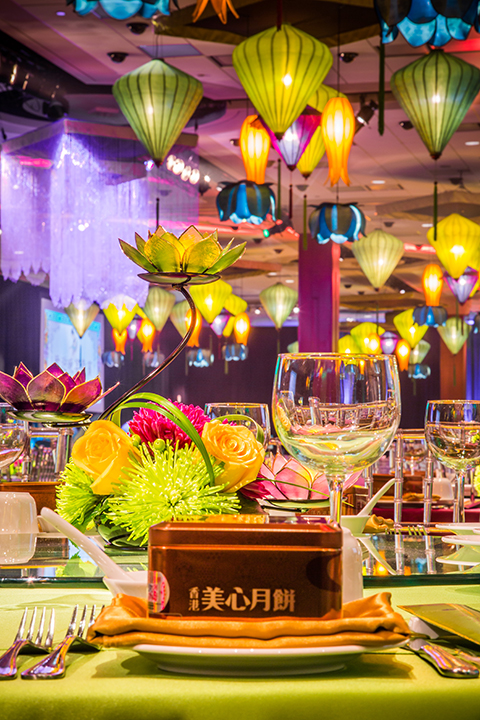
When space is tight, favors and napkins may have to be placed upon the chargers. Photo courtesy of Decor and More
Favors
Planning determines if a favor is to be placed on the table and where. You may have to negotiate for space.
Chairs
So if the chairs were not already set, now is the time. See previous notes in Part 2.
When outdoors
Once the setting is complete, cover tables with mosquito netting as there will always be falling leaves, insects, and birds present. I often use four large binder clips to hold the netting in place. Remove the netting just before guests arrive and for pouring beverages.
Tip: If wind is blowing, place a knife on the folded napkin in the center of the setting to hold the napkin from blowing away.
Server station
In a central location, set aside extra or back up flatware, napkins, stemware, water pitchers, wine, and condiments. Guests will drop them and need replacements; often extra guests show up or they want to squeeze someone into a table. Create multiple stations and divide the area into zones, one station per 200 guests.
Greeters & trays
Oval trays and tray stands should be set nearby the entrance doors. Greeters are staff assigned to welcome the guests as they come through the door. Greeters can point out locations of the restroom, bar, coat check, and assigned tables, plus collect cocktail glasses, serving vessels, and cocktail napkins. This greeting and assistance helps guests get to their tables quickly and the tables are less cluttered with items for staff to clean up.
Clean up
Remove everything not needed on tables: trash cans, work tables, packaging, containers. The room is nearly ready for the guests to walk into.
Final touches…
Walk thru the dining area. Check:
• Debris collected and removed?
• Lightbulbs all working?
• Finger smudges on glass doors
• Entrances swept?
• Ashtrays clean?
• HVAC set?
• Lighting level adjusted?
• Windows open? Closed?
• Rainy season; Floor mats and umbrella stands in place?
• Coat check? Or racks and hangers if no coat check service.
• Look around, what else needs attention?
Ta da!
Congratulations! The dining area is now set!
I make it a point to track the team members and their time to set up, and then I post the results for some healthy competition.
The checklist is living document. It evolves. It can be customized for certain events and venues.
Every so often staff will suggest an adjustment; I listen and occasionally agree. If so, we try it and make the adjustment. If there is improvement, we’ll hang onto it. I also reward staff for their thinking. Having buy in can go a long way to getting better. Let the staff show you how smart they can be.
Roy Porter is the Activities Director for Los Alamitos, CA based Engage Works, an off-premises catering-focused consultancy specializing in FOH, table, and bar service.